Showing posts with label Mendel90. Show all posts

Sunday, 29 November 2015

I shall call him: Mini Me


I was at Oldham Library and Lifelong Learning Centre with Hack Oldham for the monthly 'Hack the Library' meet up.

Basically, it's a geeky get together to show the public what the Oldham Makerspace is about.

We got to use the library's Vex IQ robotic system.


And we used the Hack space's Cubify Sense 3D scanner to introduce local kids to the technology.


As the owner of a Mendel90 it seemed rude not to get a scan of myself. One of the members decided it would be a good idea to film the process:


This results in a .ply file which contains the 3D information and textures:

It can be viewed in Meshlab, and exported as a .STL file for printing:


I normally use Skeinforge to slice .STL files, but I always seem to have trouble getting it to create support material. For this print I use Slic3r which I set to use a layer height of 0.2mm. My Mendel90 has a 0.4mm extruder nozzle and I have never used such a small layer height before, but I was not disappointed:

Monday, 25 August 2014

CNC....continued


Visit Tagbits to see the full range of tagger products described in this blog.

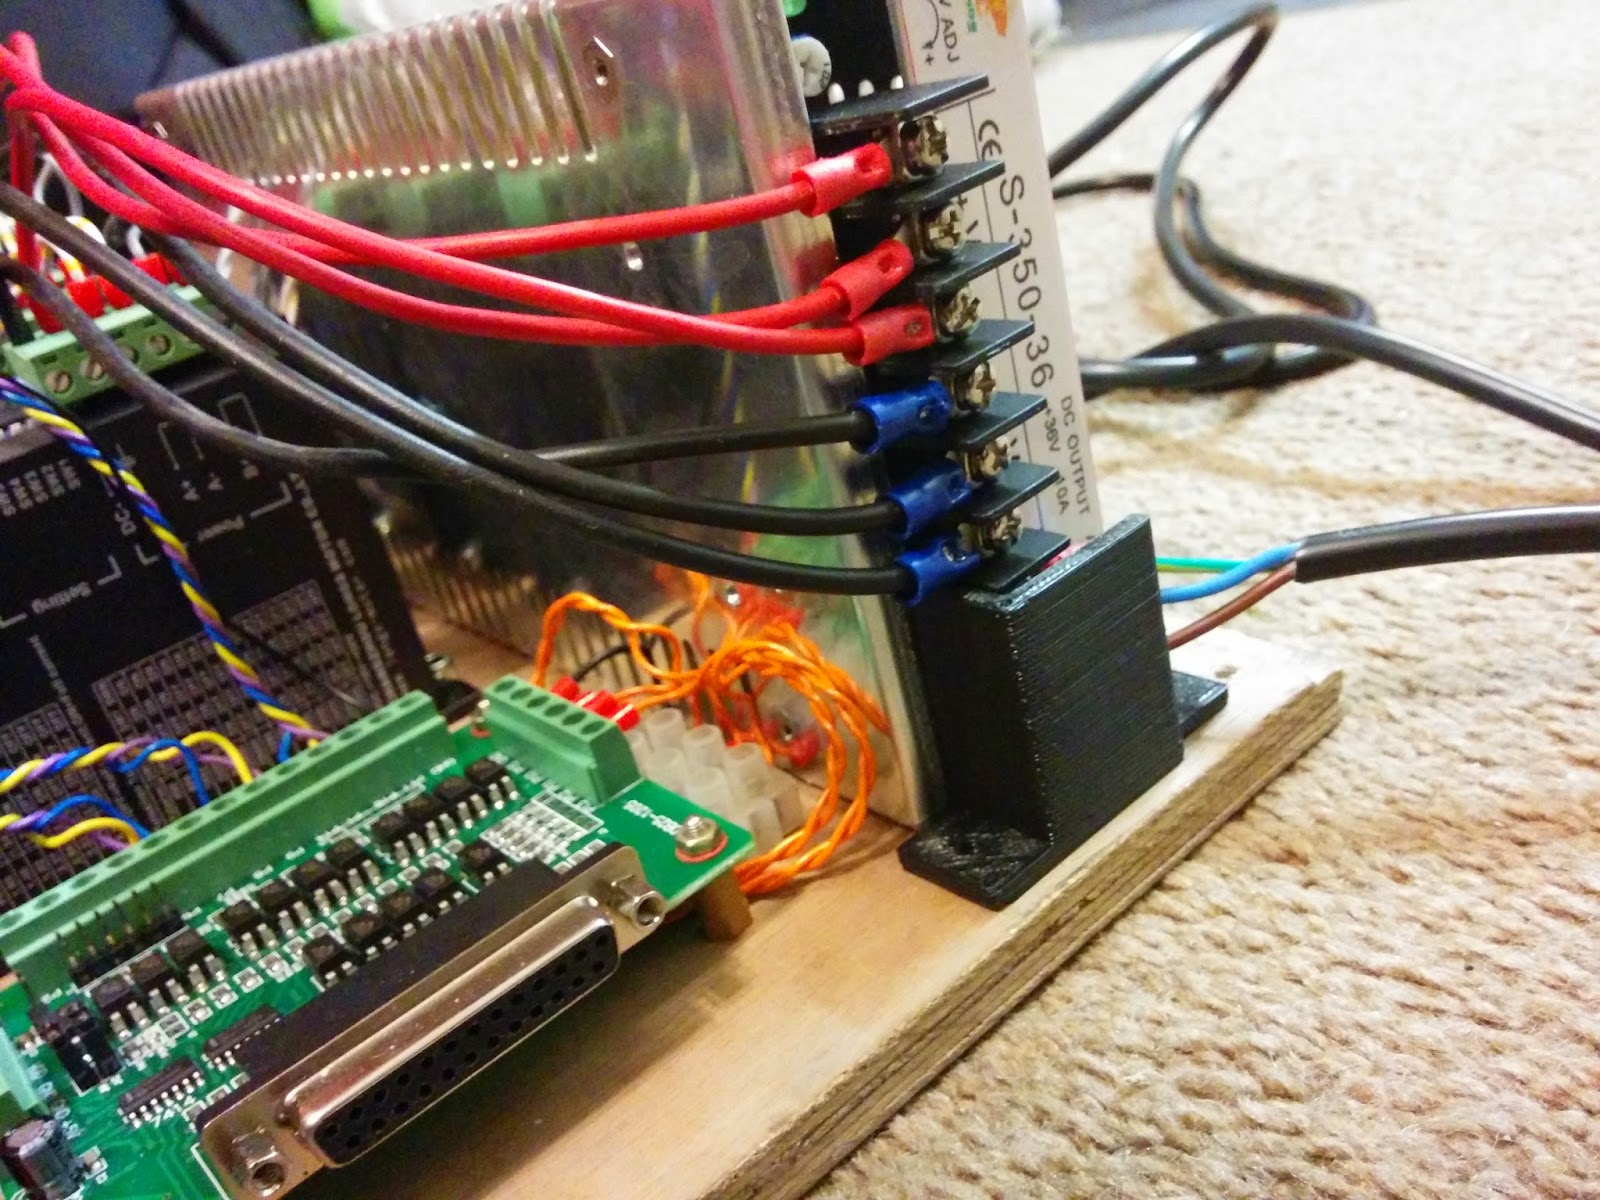
This week I've found time to make the control unit for my CNC router. It's standard Longs stepper controllers with a switch mode PSU and a parallel port break out board.

I 3D printed a mount for the connectors to the stepper motors and limit switches, and I've wired using bootlace ferrules to make it a bit neater.


The mains connection to the PSU was open, so I 3D printed a small cover for it on my Mendel90:

Thursday, 29 May 2014

In Tandem

Gunbot with Z Probe and Mendel 90 printing simultaneously.X Axis a bit noisy.....

Thursday, 19 December 2013

Illuminati


Visit Tagbits to see the full range of tagger products described in this blog.


My Mendel90 lives in a heated chamber in the garage. It's dark in there, and I got fed up of checking on print progress with a torch.

Luckily I work for a company that has this sort of thing lying around:


It's a PCB strip with 5 RGB LEDs wired to produce white when supplied with 12V d.c. This was a Mk1 which was to be binned, so I saved it an fitted it into my M90 heated chamber.

Now I can see the prints as they progress:

Tuesday, 11 June 2013

Mendel90 Heated Chamber

I've been very happy with my Mendel90, but attempting to print larger parts in ABS resulted in the inevitable warping of the part as the ABS cools. Nophead has done a load of work on this subject, and my original printer uses a chamber also. So I designed some corner brackets to allow me to make a chamber for the Mendel90 from 6mm MDF. As there are no spare temperature inputs on the Melzi controller, I bought a cheap PID temp. controller off ebay, and wired it into a hot air gun. My '90 is in the garage and needs much more heat than cooling:


Below are the results, keeping the chamber at 45C makes a major difference to the warping. The right hand side shows the same part printed without heating:

This is using ABS juice to glue the parts to the bed. I'm going to try a combination of kapton tape and ABS juice next.

Thursday, 7 March 2013

Stuck....


The first prints I did on my Mendel90 were from clear PLA. These came out really well. However, I changed to fire engine red PLA from Faberdashery and I just could not get it to stick to the glass bed.

In the pub with nophead on Friday lunch and he suggested I increase the hot end temperature. This didn't help, even when I also raised the bed temperature.

I've used this PLA on my other printer with no problems, so I decided to try replacing the glass bed. I bought some 0.9mm aluminium sheet from ClickMetal ordered to match the heated bed dimensions. I then covered this with kapton tape. The next print I did the PLA stuck well and completed as expected:


Another reason for me taking this approach is that I regularly print parts in ABS that have a large surface area in contact with the bed. I use kapton tape as these parts tend to lift from the bed, and ABS sticks very well to kapton. The problem I have is that it sticks so well the only way to get the parts off is to flex the bed. Obviously it is easier to flex a thin metal sheet than one of glass.

Here is my Mendel90 doing its first ABS print:

Thursday, 14 February 2013

Mendel90 Kit: Completed

I finally got my Mendel90 kit printing today, after replacing the duff PSU I had with an 'offical' one from Chris. It's taken me about a full day to get it built, which is quite reasonable. The first models I printed were the Android bots from the gcode file supplied with the kit:


The quality is superb. I'm using some bluish transparent PLA that I've had lying around for ages from Fabadashery.

Here is the statutory video of it:

Sunday, 13 January 2013

I'm fortunate to have access to Nopheads python software. This has the advantage that the extruder temp, heated bed temp, extruder nozzle size and offset from hot end to bed are all accounted for in software. The main advantage in this system is the Z probe. This samples the print bed and calculates a plane against which the gcode is offset to produce a print which is at 90 degrees to the bed.
As I use multiple extruders, but I am a crap machinist, I need to make sure that the length of the hot ends I make is consistent. Due to beer and inexperience this is seldom the case. But I found a great way to compensate for my cock-ups. Just shift the hot end down until it's end is below that of the Z-probe.
Here you can see the the peek barrel where I have lowered it:

Mendel90 X Carriage fan assembly

This is a really easy part of the build. But it's a fantastic printed part. It ducts air onto the printed plastic but avoids cooling the hot end. This IMHO is what RepRap is all about: a custom design for a none trivial function.


Here you can see the underside where the air duct avoids the hot end which protrudes from the centre:

Thursday, 10 January 2013

Mendel90 Print Bed

After a break of a few days, I finally got around to completing my Mendel90 print bed assembly.

As mentioned, I'd agreed with nophead to accept some parts that were not finished, and the only task that needed doing here was tapping the Dibond to M3.
To do this I used a tapping chuck:


This is ideal for tapping soft, thin materials as you can turn it with one hand, whilst using the other to keep the tap straight.
I was then able to fit the M3 spacers, and after wiring, attach the heater PCB to the carriage:

Friday, 4 January 2013

Mendel90 X Motor Assembly


With the Christmas break affecting dispatch and delivery of parts, the replacement 15way IDC D types, which I broke due to an unfortunate combination of inebriation and stupidity, arrived yesterday.

I've now been able to complete the X axis motor assembly of my Mendel90 kit.

I like the way all the cables are bundled in a single ribbon cable. My current printer has many single cables that although functional, look untidy.
It was was easy to build and it looks good with the neat cable routing:


Having already completed the Z axis motor assembly, the next step is the Z-axis.

Monday, 31 December 2012

Happy Holiday


I've been changing between PLA and ABS plastics over the Christmas holidays. Every time I flush the extruder from one plastic to another I seem to encounter blockages and general problems, which result at least in me having to dismantle the extruder.
Left to a single plastic, they seem fine. So I've decided to have multiple extruders, one for each plastic type.

So over the holidays, I made myself a new 0.4mm extruder hot end:


Sunday, 23 December 2012

Mendel 90 full kit stages 2 and 3


See Nophead's post here for full kit details.

With all the build up to Xmas I managed to sneak in enough time to complete stages 2 and 3 of the Mendel90 kit today with help from son Josh.

Stage 2 is quite trivial and involves bolting a fan to the side of the frame. The fan I had on hand needed some different bolts which I conveniently had lying around:


The X Idler assembly was quick to assemble and took about half an hour

Saturday, 22 December 2012

Mendel90 Full Kit Build Stage 1


Visit Tagbits to see the full range of tagger products described in this blog.

I've completed the first stage of my Mendel90 full kit build. Instructions so far are great, and once I'd taken the protective film off the Dibond sheets I could fully appreciate the quality of the CNC machined parts.


As mentioned in my last post, I agreed to take a some 'offcuts' from Nophead to get me going sooner, which is why the gantry is in silver Dibond, and the base and sides black. Normal kits will be the same colour!

One thing I really appreciated was that all the fastener vitamins were in labelled bags. This made it a lot quicker for me to find the right parts:


So here is stage 1 complete, total time, about an hour.

Tuesday, 17 July 2012

Mendel90 Hot End


I've just finished making a new hot end for a new extruder: It is based on one of nophead's designs and has a few interesting features:

There is a grub screw to prevent the brass nozzle from working loose.


The brass nozzle is screwed into both the peek and an 8mm internal PTFE liner. The nozzle thread has been coated with high temperature silicone to improve the seal.


At the other end there is a 4mm high, M9 threaded brass plate with a slot to push down on the PTFE liner to prevent it moving.


Haven't had chance to try it yet.