To finish my router I needed to make the Z axis. Here you can see the linear bearings and the ball nut mount on top, with the Kress router mount below.
I had already ordered some 15mm plate aluminium for this and using the print and punch method I centered the holes.
The linear rails that guide the Z axis needed fitting to the Z axis mount plate that rides on the Y axis. I followed my usual print/punch technique
but fortunately I placed the linear rails that had had drilled over the print, and noticed that only the first 4 holes at each end lined up with the print. I had asked someone to drill the holes in the linear rails for me and I have no idea how this happened.
So I have 4 holes that are aligned at the top of the rails, with another 8 holes below that are not. To get around this I drilled and tapped the 4 top holes of each rail that were OK, then I fitted the linear rails and bolted them down. I then fitted the Z axis onto the rails and moved this up and down to make sure the rails were parallel.
I then centered the existing holes at the bottom of the rails in the vertical mill, and drilled the Z mount plate.
These holes were then tapped and the Z rails fitted again. With the Z rails held in place to and bottom AND aligned with the linear bearings, I centered, drilled and tapped the remaining holes.
Whilst tapping the linear rail mount holes, I realised that some of the bolt holes that fasten the Z mount plate to the Y axis needed to be recessed as the rails were directly over the holes and these needed to be flush to the surface. To allow easy alignment of all the holes I milled a slot and a counter bore slot at these positions to allow an M6 cap head bolt to be recessed. You can see these here whilst I tap the linear rail holes.
Here is the Z mount plate after milling, tapping and drilling.
After assmbly, I fitted the Kress router and wired up the stepper motors and limit switches to check the fit. The stepper motors connect to the ball screws using a plum joint to ensure any miss alignment between the motor shaft and the ball screw does not cause a problem (The aluminium cylinder with the red bit).
The motors are held in place with 4 lengths of aluminium tube bolted with a carriage bolt from Wilko.
These came from a odd length of aluminium tube I bought at a traction engine rally. They were cut to length on the lathe. The screws are coach bolts.
The head is too large a diameter and so I turned them down on the lathe.
Once in place. They provide an excellent mount for the motors.
With everything I place I tested the axes only to be met with a horrible noise when the Z axis moved. Checking everything revealed nothing so I resorted to a complete disassembly. I discovered that the Z ball screw and ball nut had corroded. These have been lying around the garage for 2 or 3 years but there is no damp. The other 2 nuts/screws are ok so I think I just got unlucky. I ordered a replacement.
With the machine built, it was my plan to have it mill holes in its own bed so I could tap these and use them to fasten clamps. I have been using the excellent Mach3 as a controller for the machine. After a few false stars with this I had unsuccessfully milled a couple of 0.2mm deep holes when I realised it would be quicker to just drill the holes myself. At this stage I told the machine to home itself.
When I designed the machine I was hoping that it would be capable of milling aluminium. My hopes were confirmed when I told it to home when it was 5mm deep in the bed. Mach3 homes first on X/Y then Z. As a result, I milled a 6mm wide, 5mm deep slot in the bed in 3 seconds.
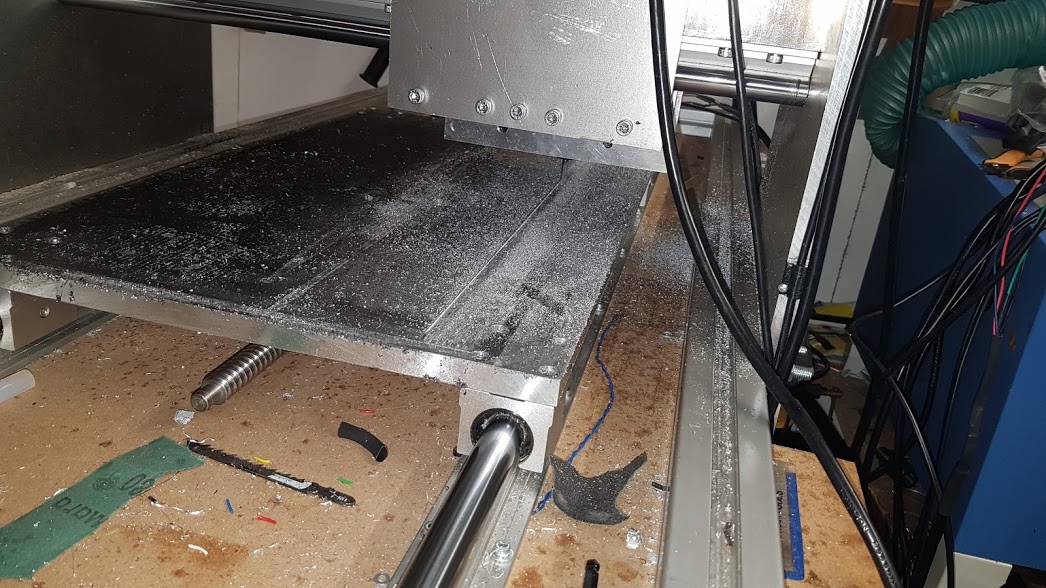
During the abortive self milling attempt I realised that the bed was not orthogonal the the Y and Z axes. To fix this I asked the machine to mill itself flat,
This was a long operation.The bed is 600 x 350mm and I needed to take about 0.8mm off in 0.2mm steps using a 6mm end mill. So a day later the bed is level and I star to drill the holes for the clamps on my vertical mill.
With all the holes cut I tapped them to fit the clamping kit I have for the mill.
These are great for fastening variable height work pieces.
With everything in place. I attempted my first milling operation.
I'm using MACH3 on a an old Windows XP machine I blagged from work with a Chinese stepper motor driver and power supply driven from the serial port. It was at this point I realised the X axis was inverted. A simple checkbox change in the MACH3 application to sort it out.