Friday 31 December 2010

Getting to the core

As I've now completed the Reprap'd gun casing I've turned my attention to assembling the Milestag RevH core module PCB. I got these delivered from Lasertagparts to a friend in the USA and brought them back with me whilst on a visit, which avoided significant postage fees (not sure why the postage is significant, they are small and light).

All the electronic components arrived in time for Christmas from Farnell, Mouser and DigiKey. I've had to buy a lot more bits than I require but I intend to make more than one unit (of course!).


I've not assembled any totally through hole PCBs for a while, my last 2 projects were surface mount but I have these to help me with the axial components:


They produce perfect, 90 degree, repeatable bends on axial leads thus:


Which significantly speeds up the assembly process.


I had an problem trying to order 2x3 and 2x2 0.1" headers required for the LCD interface on the PCB. I just could not get them so I doubled up a strip of single 0.1" header that I had lying around cut to 2 pieces of 1x3 and 2 pieces of 1x2.


Here is the assembled PCB:


The next step is to program the microcontroller.

Monday 27 December 2010

Painting and decorating

Over the Christams holiday I've attempted to fit all the housing hardware and paint the case.

To paint I first cleaned each part with solvent, then sprayed with a silk finish, solvent based paint. This seemed to bond very well, as you would expect.

I then attempted to fit the 3.5mm jack socket I plan to use for the RS232 interface. But the hole I had recessed in the CAD design was not wide enough to accept outer diameter of the socket, and the depth of this recess was insufficient to allow the threaded end to protrude enough for the mounting nut.

This was a problem as this hole is inside the housing and there is no clearance for a drill. I could not drill into the housing from the outside as I neede to maintain a 6mm hole to mount the socket.


I eventually widened the hole by heating a short M10 bolt and by holding this in mole grips, I melted the hole to be the correct diameter and depth.


Here is the casing with the jack socket fitted:


I laid out all the parts with hardware fitted. Here is a detail of the LED focus mount.


And its place in the barrel section


Here is the barrel, IR LED, muzzle LED wiring, mode switch, power switch and trigger from the inside


And from the outside


The LCD display, speaker, battery, battery cover and reload switch from the inside


and outside


Everything seems to fit. I've got all the electronic parts for the REVH board. All I need to do now is build the core module

Thursday 23 December 2010

Costs

I've been asked how much the plastic costs to manufacture one of these milestag gun housings. After a rather inebriated afternoon at the company xmas do with nophead he told me that the ABS filament he uses costs 2p per gram. The weight of my gun parts is 522g = £10.44UKP for a single gun housing. This compares very favourably with airsoft guns which cost £140+ in the UK and still need to be engineered to contain the MILESTAG electronics.

My design is custom engineered to fit the stock milestag electronics so there is no cutting, gluing, drilling required.

Wednesday 22 December 2010

Barrel stays

My design for a RepRap MILESTAG gun requires that the barrel is prevented from rotating about or sliding along its axis. Sliding would result in the barrel becoming longer or shorter which is obviously ridiculous. Rotation is a problem when there are attachments to the barrel (such as my aesthetic flash suppressor) or muzzle flash LED wiring.

I originally designed two rings, one of which had small tabs which mated with the barrel housing to prevent rotation. These tabs were woefully inadequate and I snapped one off whilst installing the barrel.

Here is a picture of the two rings installed. Note the small (i.e. inadequate) tab on the right hand side barrel ring.


I redesigned the holding brace and nophead printed it to his usual high standards:


And here it is fitted.


Saturday 18 December 2010

Full assembly

I managed to assemble the complete milestag gun housing today and I've had to address a few issues whilst doing so.

Here is a picture of the completed gun housing


And another showing the mounted lens


As mentioned in my previous post, the recessed radii I use to mount exisiting circular objects (e.g. lens, barrel) were imperfect so I had to use a half round file for the barrel mounts and a Dremel with a bur for the lens mount.

Secondly, the RepRap'ed parts are not perfectly square and made worrying cracking noises as I tightened the self tapping screws. Upon disassembly I noticed that some of the plastic layers had detached from their immediate neighbours due to the stresses of straightening out the housing as the screws were tightened.

I've managed to repair the damage with ABS solvent and this seems to have generally strengthened the parts as the layers are all now fused together (on the outer surfaces at least).

I believe that the ultimate solution to this is to sand flat any imperfections on a linisher before assembly.

The next step is to paint the ABS with a solvent based paint and fit the electronics.

Friday 17 December 2010

Last piece(s) of the jigsaw

nophead kindly delivered the last pieces of my milestag gun housing today.These are the fittings and fixtures that make it work:

Here is the aesthetic flash supressor that fits on the end of the 20mm conduit barrel


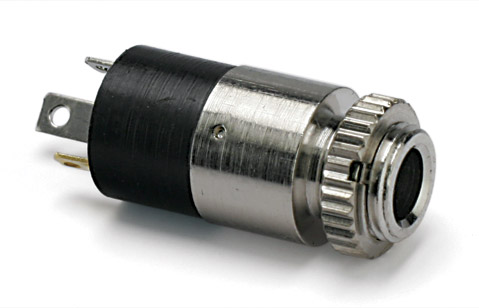
The trigger fitted to the previously presented grip


The battery cover


The LED focus mount and aligner


The barrel alignment rings. These stop the barrel moving along the axis of the gun and the tabs are intended to stop the barrel rotating


These are 2 x LED diffusers not on the original CAD drawings. They are made from translucent PLA and are designed to fit in the end of the conduit barrel to mount and diffuse the muzzle flash LED


I started assembling the grip and breech this evening. I used #4 x 19mm self tap screws to bring the housing parts together. I had several problems with my design:

1. The holes the screws were to screw in to were too small. The self tap screws are imperial size #4 x 19mm with a diameter of 2.88mm. Some testing with scrap plastic showed that a hole of 2.5mm was best and I had to drill all receptacle holes to this diameter.

2. I had not sufficiently countersunk the mounting holes on the breech section. Subsequently the self tap screws did not protrude from this part. I had to increase the countersink depth by 12mm.

3. Several of the parts of this design require a 'sliding' fit. i.e. the trigger and the LED focus mount. I had CADed these to exact dimensions but RepRap seems to make things slightly bigger, and the ridges caused by the layer extrusion tend to interlock so these parts needed to be filed.

4. The small tabs on the barrel rings are meant to prevent the barrel from rotating but they are too small and will easily snap off. I need to thicken them up in the next revision.

5. The barrel and lens mount radii do not fit the 'perfectly' rount barrel conduit and lens. This is because RepRap extrudes layers of a finite size which results in a imperfect circle. The result of this is that the halves of the housing do not meet properly where there is a diameter between them (i.e. the barrel section, the flash suppressor). These parts currently require sanding. I believe that I need to increase the radius of these radii to fix this. Really need to do some empirical testing.

6. On several parts I had not allowed sufficient clearance for the head of the self tapping screws. A minimum of 5.5mm is required for #4x19mm screws.

Here is a picture of the assembled breech section complete with grip


And the LED focus mount in position


Assembly

I ordered the electronics for the Milestag RevH board yesterday. It was rather expensive as not all parts are readily available in the UK and I was forced to pay 12UKP shipping charges.

As soon as the components arrive I'll be able to complete the gun.

Tuesday 14 December 2010

nophead delivers!

nophead has been busy working on my Milestag prototype this last few days and the results are impressive. All the large parts have now been printed, all that remains are a few ancilliary components such as the trigger, LED mount etc. See my previous blog entry for the CAD pictures that produced these parts.

Here are some pictures:


The main gun sections:


One side of the barrel section fitted with 20mm conduit barrel:


The 'breech' section with LCD, speaker and reload switch:


The outside of the breech showing speaker holes, LCD and reload switch:


Handgrip sections with microswitch in position:


Barrel section with lens. Also shows focusing rail:


And finally, assembled breech and handgrip:

Thursday 9 December 2010

Milestag

My 8 year old son Joshua and I went to Flamingoland for his birthday and had a go at 'Crazy Combat Laser Battle'. We both had a great time and this got me thinking.....

The system they use is MILESTAG a sort of open source 'Laser Tag' system. I was already familiar with the system and my encounter with it was the catalyst I needed to make my own.


I ordered PCBs and plastic domes from www.lasertagparts.com and had them delivered to a friend in the USA I was about to visit. There was a slight problem with the order but a quick 'phone call to the site operator Jim sorted it out.

It occurred to me that the majority of the work required to get a working system involved manufacturing a gun housing, or buying an existing (e.g. Airsoft) gun and modifying it.

I've been monitoring the RepRap movement for a while and it seemed to me that it would be a good medium to build a gun housing with.

I've known nophead for far too long and he very kindly agreed to use his 3D printer to manufacture a custom Milestag prototype for me.

I used CoCreate personal to design the housing. It includes battery compartment, grip, microswitch trigger, lens mount, adjustable IR LED mount, PCB, speaker, LCD, RS232 , mode/reload switches in one modular unit.

Here are some pictures of the whole gun, complete with aesthetic flash suppressor:


Here is a picture of the lens mount and adjustable 5MM LED mount. The lens is a standard 32MM plano convex unit from Surplus Shed and the LED can be adjusted to obtain the optimum focal distance.


This last image shows the speaker/LCD mount and reload switch:


Here is a 'proof of concept' 3D print of the CAD image above. It is damn close to perfect. Going to hassle nophead for the rest soon.


This is my first ever attempt at 3D CAD so I'm sure the next version will be better.