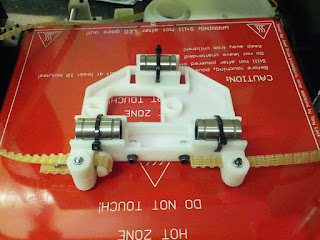
Completed the X-Axis last night after a brief tussle with the orientation of one of the bar clamps (Thanks Mary!).
So here it is pretty much complete now:
And with the spool holder assembly fitted:
Friday, 25 January 2013
Wednesday, 23 January 2013
Mendel90 build continued
After spending last week in Kiev, I've finally found time to resume my Mendel90 build.
Tonight I managed to complete the extruder assembly. I've built a few of these of varying designs and this one is nice because of the 15 way D-type that brings the stepper and hot end connections to a single point.
Here is the extruder motor assembly, the D-type connector can be seen mounted to the small PCB that has screw terminals on it:
This assembly is then attached to the remaining parts of the extruder:
Sunday, 13 January 2013
I'm fortunate to have access to Nopheads python software. This has the advantage that the extruder temp, heated bed temp, extruder nozzle size and offset from hot end to bed are all accounted for in software. The main advantage in this system is the Z probe. This samples the print bed and calculates a plane against which the gcode is offset to produce a print which is at 90 degrees to the bed.
As I use multiple extruders, but I am a crap machinist, I need to make sure that the length of the hot ends I make is consistent. Due to beer and inexperience this is seldom the case. But I found a great way to compensate for my cock-ups. Just shift the hot end down until it's end is below that of the Z-probe.
Here you can see the the peek barrel where I have lowered it:
Mendel90 X Carriage fan assembly
This is a really easy part of the build. But it's a fantastic printed part. It ducts air onto the printed plastic but avoids cooling the hot end. This IMHO is what RepRap is all about: a custom design for a none trivial function.
Here you can see the underside where the air duct avoids the hot end which protrudes from the centre:
Here you can see the underside where the air duct avoids the hot end which protrudes from the centre:
Saturday, 12 January 2013
Mendel90 Y axis
Managed to finish my Mendel90 kit Y axis today. I like the way the cables are routed under the dibond base. A small detail, but it keeps the build neat.
Subscribe to:
Posts (Atom)


