Showing posts with label proton pack. Show all posts
Showing posts with label proton pack. Show all posts
Sunday, 4 January 2015
Making parts look right...
My Ghostbusters proton pack replica uses several pneumatic fittings that were available to the prop builders in the 80', but are no longer manufactured.
A result of limited availability and demand has led to some crazy prices for these parts.
The parts that can cause problems are: The Legris Banjo:
I've seen originals of these going for $100 each on ebay, and a resin cast replica which needs some finishing will cost over 20GBP with postage from the US.
Another part is the Legris straight fitting:
These again will cost me around 30GBP to import from the US as a pair.
So I decided to make my own.....
I asked the Iron Man of Maine to measure the ones he has, and I coincidentally had some brass hex bar of exactly the right dimentions.
I had to make two of these, so first I parted the bar:
Then I turned it down to give the pipe exit 'nipple':
I then drilled the hole to 5mm. I did this after the turning down as the nipple walls are quite thin and I didn't want to risk damaging them whilst turning down.
I then turned the part around, and reduced the bar diameter to allow me to thread it, using the oldest tap and die set in my collection. I used this as the threads of the metric dies I have seemed too coarse compared with the reference picture:
I used the end stop chuck to hold the die against the workpiece to get it started:
To create the circular depression in the top of the part, I used an old lathe tool that was made by my wife's late grandfather. This has a really small tip and is right angled to allow me to apply it to the end face of the work piece:
It came out looking really well, but too shiny. So I applied some dilute ferric chloride solution to the machined surfaces for a couple of seconds to dull them, before washing off with water:
For the Legris Banjo, I decided to try 3D printing. They came out quite well, and I smoothed them out with acetone vapour. For a brass like effect, I bought some some antique gold metallic paint. But it was too 'gold' So I added a trace of black.
It came out looking OK, but I tested it on a brass bar I had lying around: The bottom 2cm of the bar have been painted. It looked so good I had to scratch the paint to make sure it was actually covering properly.
After painting the banjo, I think this is not too bad. I've put the parts on Thingiverse.
Saturday, 3 January 2015
Someone saw a cockroach up on twelve.....
Proton pack design is pretty well complete. tommyb345b has beaten me to completion with my own design. But my copy of it is coming along nicely:
All the files are available at: Thingiverse
Sunday, 2 November 2014
Seeing things running through MY head.
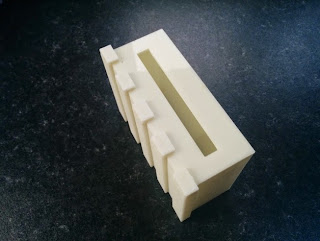
In my quest to design a fully 3D printable Ghsotbusters' Proton Pack, I've had to make the part known as the 'Synch Generator'.
This is a large part, and it's the biggest thing I've ever made, weighing in at about 770g.
It's made of 6 paired copies, plus two other pairs, and is designed to be bolted together with M4 bolts. I printed it all in PLA to avoid ABS warping. Both my printers are in heated chambers, but even that struggles to prevent warping on such large parts.
All the proton pack parts can be downloaded here.
Friday, 24 October 2014
Who Ya Gonna Call?
My wife and I have been invited to a 50th birthday party in February, but it's fancy dress....Movie Style. And she wants to go as a Ghostbuster.
This does of course mean that I'm going to have to make us a proton pack each:
Now I could buy a kit, but these start at around £500.
So, it's time to fire up the 3D printer and the CAD system.
There are excellent plans available online at the GBFans website. But these are traditional 2D drawings, and not suitable for 3D printing.
There are some partial parts available on Thingiverse...
http://www.thingiverse.com/thing:302576 http://www.thingiverse.com/thing:95635
But none of these are either full kits, or have the 'difficult' parts missing. So I decided that I'd have a go at making a fully 3D printable kit. The first thing was to make a CAD model of the pack from the 2D drawings.
From this I made each part printable. For example, the Crank Generator is split into top and bottom sections as it is a wide, tall part that would be rather wasteful of plastic if printed in one piece:
This is one of the largest parts I have printed. It came out pretty good in white ABS in my heated print chamber:
Another interesting part is the 'spinner' on top of the crank generator. These are large potentiometer style knobs from the '70s with the part number MS91528-3S2G.
Almost totally unavailable in the UK. So from limited 2D drawings online, I modelled and printed it:
Another old part is this PH25 can style resistor:
And after printing:
This is still a work in progress, and there are several more parts before it will be complete. I'm putting all the parts onto thingiverse as I go along.
All the parts are available here.
Subscribe to:
Posts (Atom)


.jpg)


